Call to Action
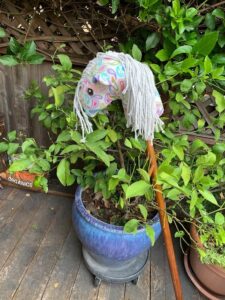 After many months of sheltering in place, I was preparing for a visit from my youngest grandchild. For her 4th birthday, her parents had reserved a space at a nearby campground where we could safely social distance. I’d been collecting hobby horse patterns on my Pinterest board, and now it was time to take out my sewing machine and get to work.
Repurposing a Beloved Toy
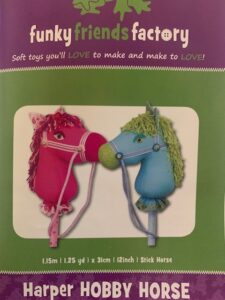
A lifetime ago, my husband built a traditional stick horse frame for our daughter. It had handles, a wooden head, and a roller at the end of the stick. I fashioned a head and mane, eyes, nose, and mouth by referring to photographs of colonial stick horses found at the Library of Congress. The stuffed head had long ago fallen apart, but I pulled the frame out of storage. I ordered two hobby horse patterns, thinking I might combine them in some way. Then I selected fabric from my stash and visited a fabric store for notions.
Putting It All Together
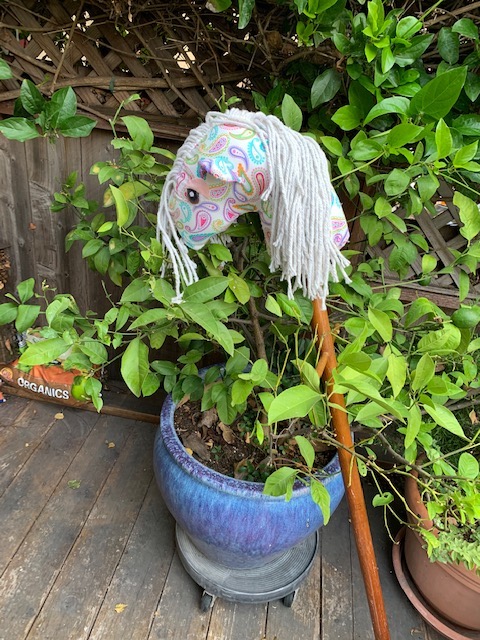
As you can see, I had to be creative with the WhimsyWoo pattern, because my horse already had a head, and it  was larger than the pattern. It took several tries to make a cloth head that fit over the wooden head and allowed enough room for stuffing.
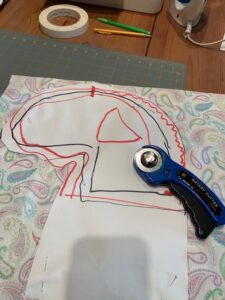 I cut out all the little pieces for eyes and ears, assembled them, then began putting the head together.
The Whimsy Woo pattern used fabric strips for the mane, and I wanted something more realistic. I bought a replacement string mop head, but couldn’t figure out how to get the string out. Google to the rescue. Karen’s Easy Stick Horse Tutorial demonstrated pulling the strings out of the mop one at a time. Why hadn’t I thought of that?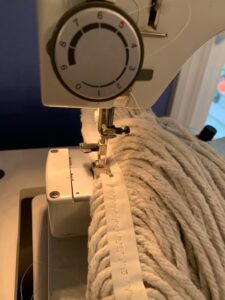
I removed the strings, arranged them on a piece of bias tape and fastened them on using the zig-zag feature of my trusty Elna sewing machine. Then I sewed the eyes on the head and ran up the seam connecting the right and left head with the mane sandwiched in between.
The hardest part was sewing the ears on the head, because I had used extra-stiff interfacing and it was difficult to get the needle and thread through all three layers of fabric. The result was not a work of art, but it was made with love.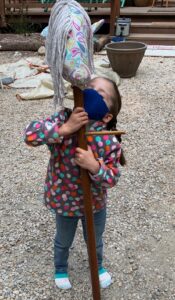
And it was all worth it on Birthday Day as you can see!
Unfortunately, the second pattern I ordered arrived after her birthday, so I wasn’t able to use it. Would anyone like it? If so, write a comment explaining why you want the pattern and how you plan to use it. I’ll take your comments to my favorite sewing circle and we’ll vote to see who gets it! Marlene
Marlene Bumgarner is a writer, teacher, parent and grandmother. She and her Border Collie, Kismet, can be seen most afternoons walking along the coast near her home in Northern California.
Her most recent memoir, Back to the Land in Silicon Valley, is available wherever books are sold.
Share this post



Hi, Marlene! It’s always so great to hear what you comment on in our Episcopal classes! I’m sorry that I’m so late in commenting on the hobby horse that you made for your granddaughter–she must really love it! It’s probably the cutest hobby horse that I’ve ever seen! Thanks so much for posting the directions. Yes, I’ve decided against trying to make one. See you in class!
– Dorothy –
Thank you so much, Dorothy! I really appreciate your kind words.
Delightful, Marlene! Your granddaughter is fortunate to have such a talented and dedicated Grandma!
Hugs from Gabrielle
Thank you, Gabrielle. It was fun to put all the pieces together — I didn’t think about politics all day.
Marlene
Very well done!! You are way ahead of me on that one! It is obvious she loves her new friend.
Thank you, Barbara.
Is there anything you can’t do? I predict that will become an heirloom.
kate,
There is a ton of stuff I don’t know how to do, but sewing was taught in junior high when I went to school!
Marlene
Thanks.
What a great photo of you!
Cynthia
Wonderful!
Thank you, Joyce! It was fun.